Insta360 ONE R Mounting Bracket (Accessory Shoe Mounting Bracket and Standard Mounting Bracket) Sale
Description
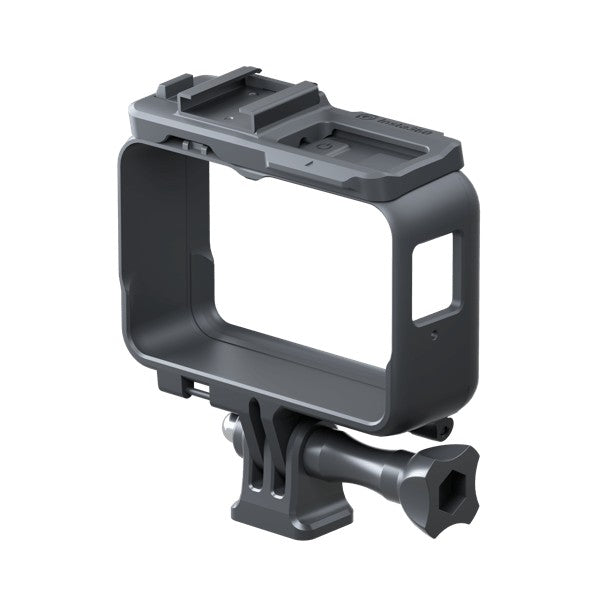
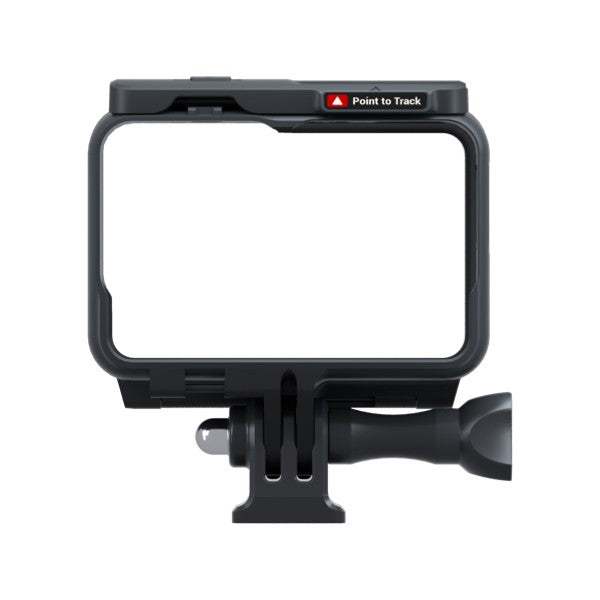
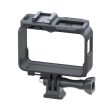
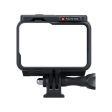
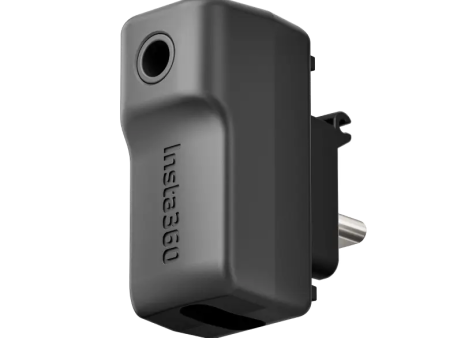
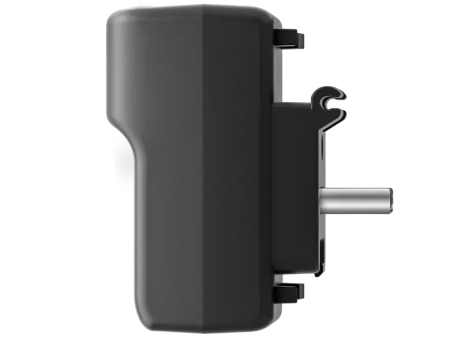
Insta360 ONE R Mounting Bracket
(Accessory Shoe Mounting Bracket and Standard Mounting Bracket)
Insta360 ONE R accessories | Mounting Bracket
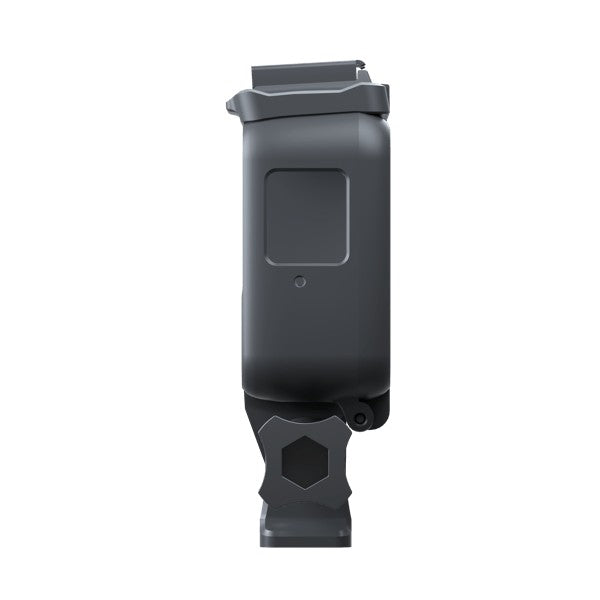
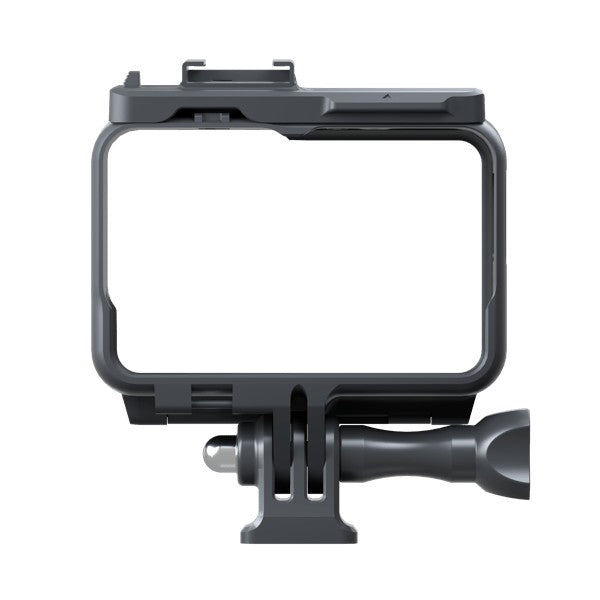
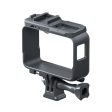
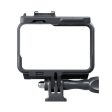
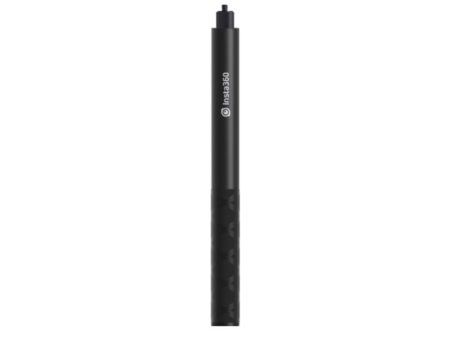
Standard Mounting Bracket

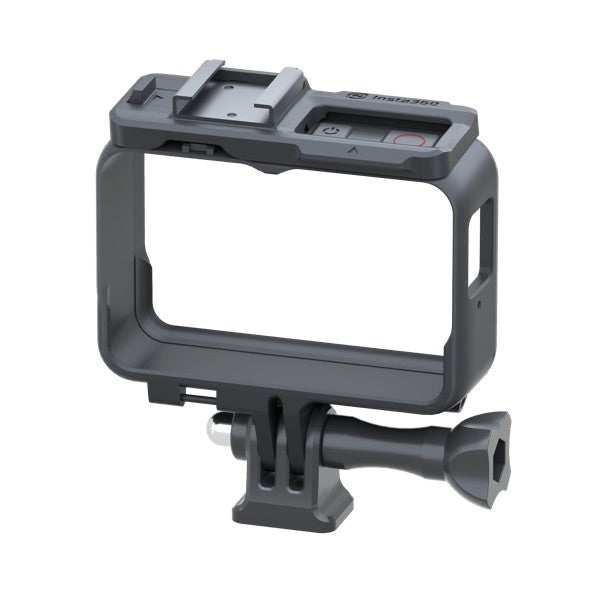
Accessory Shoe Mounting Bracket
Mounting Bracket with cold shoe top mounts to attach external mic or lights.
* The picture is for display only. The mic adapter and external mic are sold separately.
How to use – Standard Mounting Bracket
1. Open the Mounting Bracket
Push the lock buckle of the Mounting Bracket to the right (1), then pull down the buckle (2). Remove the buckle from the hook (3). When the buckle is completely disengaged, open the Mounting Bracket (4).
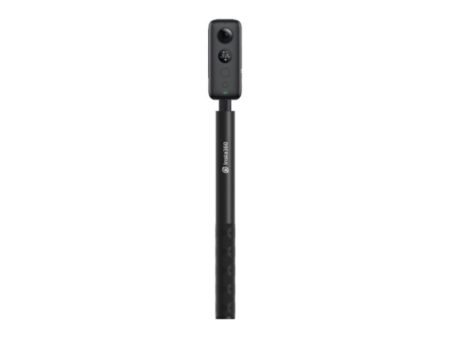
2. Insert the Camera
Be sure to insert the camera in the correct direction.
*When assembling the 1-inch Wide Angle Mod, remove its protective lens first. Once you ve installed the bracket, please re-attach its protective lens.
3. Close the Mounting Bracket
To close the Mounting Bracket, latch the buckle with the hook and push the buckle until it clicks.
4. Attach the 1 4 Adapter
To shoot with the invisible selfie stick, attach the 1 4 invisible selfie stick adapter to the Mounting Bracket.
How to use – Accessory Shoe Mounting Bracket
1. Open the Mounting Bracket
Push the lock buckle of the Accessory Shoe Mounting Bracket to the right (1), then pull down the buckle (2). Remove the buckle from the hook (3). When the buckle is completely disengaged, open the Bracket (4).
2. Insert the camera
Be sure to insert the camera in the correct direction
(The following instruction uses the 4K wide-angle mode as an example)
*Note: When using the Leica mode, remove its lens guard first. Having installed the bracket, please re-install its lens guard.
3. Close the Accessory Shoe Mounting Bracket
To close the Mounting Bracket, latch the buckle with the hook and push the buckle until it clicks (The following instruction uses the 4K Wide Angle Mode as an example).
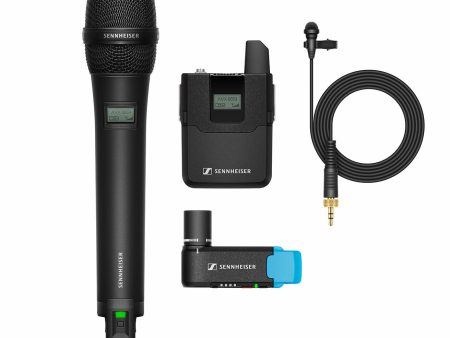
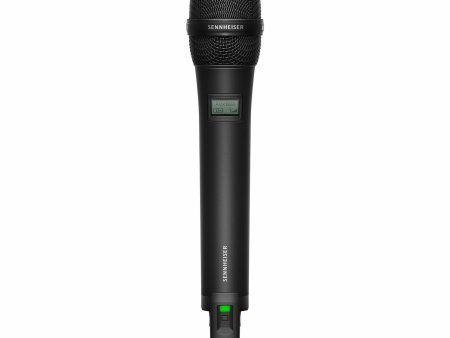
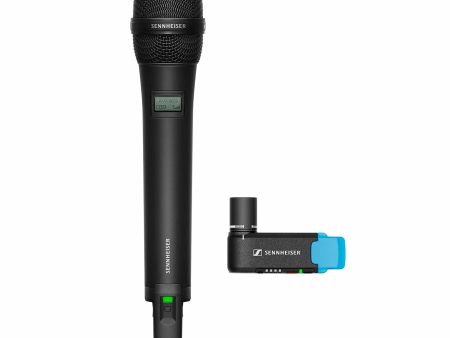
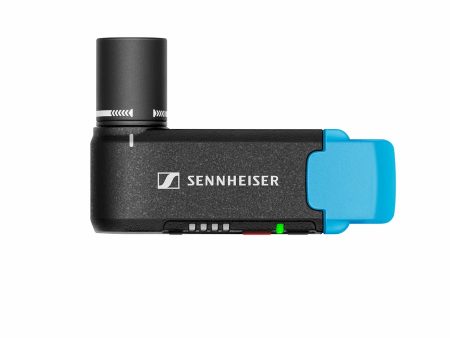
4. Mount an External Mic or light
You can mount an external mic or external lighting to the Accessory Shoe on top of the mounting bracket.
Note: In non-action environments, the mounted accessories weight should be within 250g (8.818 oz). In action environments, the accessories weight should be within 130g (4.585 oz), and its height shouldn t exceed 10 cm (0.328ft).
Related products
Sennheiser AVX-COMBO Handheld MMD 42 Lavalier Set Online Sale
Original price was: $1,058.76.$317.63Current price is: $317.63.
OEM Insta360 X3 Screen Protector (3rd-Party) on Sale
Original price was: $4.90.$2.45Current price is: $2.45.
Insta360 X3 Mic Adapter For Discount
Original price was: $20.20.$10.10Current price is: $10.10.
Insta360 120cm Invisible Selfie Stick (X3 GO 2 ONE X2 ONE R) Discount
Original price was: $11.22.$5.61Current price is: $5.61.
Sennheiser AVX-835-Handheld Mic Set For Cheap
Original price was: $752.76.$225.83Current price is: $225.83.

hypeussuper.shop © 2025 All Rights Reserved
-
-
Select the fields to be shown. Others will be hidden. Drag and drop to rearrange the order.
- Image
- SKU
- Rating
- Price
- Stock
- Description
- Weight
- Dimensions
- Additional information
- Add to cart
(Accessory Shoe Mounting Bracket and Standard Mounting Bracket)
Insta360 ONE R accessories | Mounting Bracket
Standard Mounting Bracket
Accessory Shoe Mounting Bracket
Mounting Bracket with cold shoe top mounts to attach external mic or lights.
* The picture is for display only. The mic adapter and external mic are sold separately.
How to use – Standard Mounting Bracket
1. Open the Mounting Bracket
Push the lock buckle of the Mounting Bracket to the right (1), then pull down the buckle (2). Remove the buckle from the hook (3). When the buckle is completely disengaged, open the Mounting Bracket (4).
2. Insert the Camera
Be sure to insert the camera in the correct direction.
*When assembling the 1-inch Wide Angle Mod, remove its protective lens first. Once you ve installed the bracket, please re-attach its protective lens.
3. Close the Mounting Bracket
To close the Mounting Bracket, latch the buckle with the hook and push the buckle until it clicks.
4. Attach the 1 4 Adapter
To shoot with the invisible selfie stick, attach the 1 4 invisible selfie stick adapter to the Mounting Bracket.
How to use – Accessory Shoe Mounting Bracket
1. Open the Mounting Bracket
Push the lock buckle of the Accessory Shoe Mounting Bracket to the right (1), then pull down the buckle (2). Remove the buckle from the hook (3). When the buckle is completely disengaged, open the Bracket (4).
2. Insert the camera
Be sure to insert the camera in the correct direction
(The following instruction uses the 4K wide-angle mode as an example)
*Note: When using the Leica mode, remove its lens guard first. Having installed the bracket, please re-install its lens guard.
3. Close the Accessory Shoe Mounting Bracket
To close the Mounting Bracket, latch the buckle with the hook and push the buckle until it clicks (The following instruction uses the 4K Wide Angle Mode as an example).
4. Mount an External Mic or light
You can mount an external mic or external lighting to the Accessory Shoe on top of the mounting bracket.
Note: In non-action environments, the mounted accessories weight should be within 250g (8.818 oz). In action environments, the accessories weight should be within 130g (4.585 oz), and its height shouldn t exceed 10 cm (0.328ft).
Related products
Sennheiser AVX-COMBO Handheld MMD 42 Lavalier Set Online Sale
Original price was: $1,058.76.$317.63Current price is: $317.63.
OEM Insta360 X3 Screen Protector (3rd-Party) on Sale
Original price was: $4.90.$2.45Current price is: $2.45.
Insta360 X3 Mic Adapter For Discount
Original price was: $20.20.$10.10Current price is: $10.10.
Insta360 120cm Invisible Selfie Stick (X3 GO 2 ONE X2 ONE R) Discount
Original price was: $11.22.$5.61Current price is: $5.61.
Sennheiser AVX-835-Handheld Mic Set For Cheap
Original price was: $752.76.$225.83Current price is: $225.83.
hypeussuper.shop © 2025 All Rights Reserved
-
-
Select the fields to be shown. Others will be hidden. Drag and drop to rearrange the order.
- Image
- SKU
- Rating
- Price
- Stock
- Description
- Weight
- Dimensions
- Additional information
- Add to cart
How to use – Standard Mounting Bracket
1. Open the Mounting Bracket
Push the lock buckle of the Mounting Bracket to the right (1), then pull down the buckle (2). Remove the buckle from the hook (3). When the buckle is completely disengaged, open the Mounting Bracket (4).
2. Insert the Camera
Be sure to insert the camera in the correct direction.
*When assembling the 1-inch Wide Angle Mod, remove its protective lens first. Once you ve installed the bracket, please re-attach its protective lens.
3. Close the Mounting Bracket
To close the Mounting Bracket, latch the buckle with the hook and push the buckle until it clicks.
4. Attach the 1 4 Adapter
To shoot with the invisible selfie stick, attach the 1 4 invisible selfie stick adapter to the Mounting Bracket.
How to use – Accessory Shoe Mounting Bracket
1. Open the Mounting Bracket
Push the lock buckle of the Accessory Shoe Mounting Bracket to the right (1), then pull down the buckle (2). Remove the buckle from the hook (3). When the buckle is completely disengaged, open the Bracket (4).
2. Insert the camera
Be sure to insert the camera in the correct direction
(The following instruction uses the 4K wide-angle mode as an example)
*Note: When using the Leica mode, remove its lens guard first. Having installed the bracket, please re-install its lens guard.
3. Close the Accessory Shoe Mounting Bracket
To close the Mounting Bracket, latch the buckle with the hook and push the buckle until it clicks (The following instruction uses the 4K Wide Angle Mode as an example).
4. Mount an External Mic or light
You can mount an external mic or external lighting to the Accessory Shoe on top of the mounting bracket.
Note: In non-action environments, the mounted accessories weight should be within 250g (8.818 oz). In action environments, the accessories weight should be within 130g (4.585 oz), and its height shouldn t exceed 10 cm (0.328ft).
Related products
Sennheiser AVX-COMBO Handheld MMD 42 Lavalier Set Online Sale
Original price was: $1,058.76.$317.63Current price is: $317.63.
OEM Insta360 X3 Screen Protector (3rd-Party) on Sale
Original price was: $4.90.$2.45Current price is: $2.45.
Insta360 X3 Mic Adapter For Discount
Original price was: $20.20.$10.10Current price is: $10.10.
Insta360 120cm Invisible Selfie Stick (X3 GO 2 ONE X2 ONE R) Discount
Original price was: $11.22.$5.61Current price is: $5.61.
Sennheiser AVX-835-Handheld Mic Set For Cheap
Original price was: $752.76.$225.83Current price is: $225.83.
hypeussuper.shop © 2025 All Rights Reserved
1. Open the Mounting Bracket
Push the lock buckle of the Mounting Bracket to the right (1), then pull down the buckle (2). Remove the buckle from the hook (3). When the buckle is completely disengaged, open the Mounting Bracket (4).
2. Insert the Camera
Be sure to insert the camera in the correct direction.
*When assembling the 1-inch Wide Angle Mod, remove its protective lens first. Once you ve installed the bracket, please re-attach its protective lens.
3. Close the Mounting Bracket
To close the Mounting Bracket, latch the buckle with the hook and push the buckle until it clicks.
4. Attach the 1 4 Adapter
To shoot with the invisible selfie stick, attach the 1 4 invisible selfie stick adapter to the Mounting Bracket.
How to use – Accessory Shoe Mounting Bracket
1. Open the Mounting Bracket
Push the lock buckle of the Accessory Shoe Mounting Bracket to the right (1), then pull down the buckle (2). Remove the buckle from the hook (3). When the buckle is completely disengaged, open the Bracket (4).
2. Insert the camera
Be sure to insert the camera in the correct direction
(The following instruction uses the 4K wide-angle mode as an example)
*Note: When using the Leica mode, remove its lens guard first. Having installed the bracket, please re-install its lens guard.
3. Close the Accessory Shoe Mounting Bracket
To close the Mounting Bracket, latch the buckle with the hook and push the buckle until it clicks (The following instruction uses the 4K Wide Angle Mode as an example).
4. Mount an External Mic or light
You can mount an external mic or external lighting to the Accessory Shoe on top of the mounting bracket.
Note: In non-action environments, the mounted accessories weight should be within 250g (8.818 oz). In action environments, the accessories weight should be within 130g (4.585 oz), and its height shouldn t exceed 10 cm (0.328ft).
Related products
Sennheiser AVX-COMBO Handheld MMD 42 Lavalier Set Online Sale
Original price was: $1,058.76.$317.63Current price is: $317.63.
OEM Insta360 X3 Screen Protector (3rd-Party) on Sale
Original price was: $4.90.$2.45Current price is: $2.45.
Insta360 X3 Mic Adapter For Discount
Original price was: $20.20.$10.10Current price is: $10.10.
Insta360 120cm Invisible Selfie Stick (X3 GO 2 ONE X2 ONE R) Discount
Original price was: $11.22.$5.61Current price is: $5.61.
Sennheiser AVX-835-Handheld Mic Set For Cheap
Original price was: $752.76.$225.83Current price is: $225.83.
Note: In non-action environments, the mounted accessories weight should be within 250g (8.818 oz). In action environments, the accessories weight should be within 130g (4.585 oz), and its height shouldn t exceed 10 cm (0.328ft).
Related products
Sennheiser AVX-COMBO Handheld MMD 42 Lavalier Set Online Sale
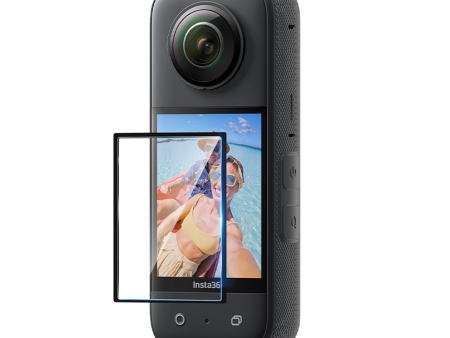
OEM Insta360 X3 Screen Protector (3rd-Party) on Sale
Insta360 X3 Mic Adapter For Discount
Insta360 120cm Invisible Selfie Stick (X3 GO 2 ONE X2 ONE R) Discount
Sennheiser AVX-835-Handheld Mic Set For Cheap
- Image
- SKU
- Rating
- Price
- Stock
- Description
- Weight
- Dimensions
- Additional information
- Add to cart